You can create a 3D object from a standard shape layer in After Effects. All you need to do is select the 3D layer switch to make the transformation.
You’ll create a platform for the bottle and wineglasses to sit on.
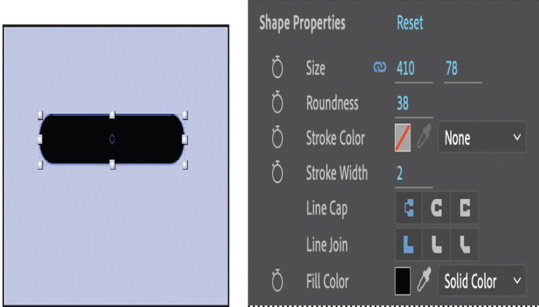
- Select the Rectangle tool in the Tools panel.
- Draw a rectangle approximately 410 x 78 pixels. You can drag the rectangle to the right size, or draw an initial rectangle, and then enter the dimensions in the Shape Properties section of the Properties panel. (Click the Link icon to unlink the height and width.)
- In the Properties panel, change the Roundness to 38 to create rounded corners.
- Change the Fill Color to black, and the Stroke color to None.
Now you’ll make the shape layer 3D and extrude the layer to create depth.
- In the Timeline panel, change the layer’s name to Platform.
- Select the 3D Layer switch ( ) for the Platform layer in the Timeline panel.
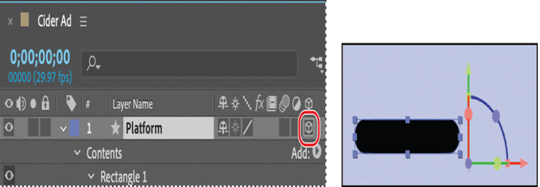
The Platform layer becomes a 3D layer. When a 3D layer is selected, the 3D Transform Gizmo appears over the layer’s anchor point in the Composition panel. The red controls manipulate the x axis, the green controls manipulate the y axis, and the blue controls manipulate the z axis. The letter x, y, or z appears when you position the Selection tool over the corresponding controls. When you move or rotate the layer while the pointer is over a particular axis, the layer’s movement is restricted to that axis.
Three 3D Rotation properties, as well as an Orientation property, appear in the Transform property group for the layer, and properties that previously supported only two dimensions now display a third value for the z axis.
Note
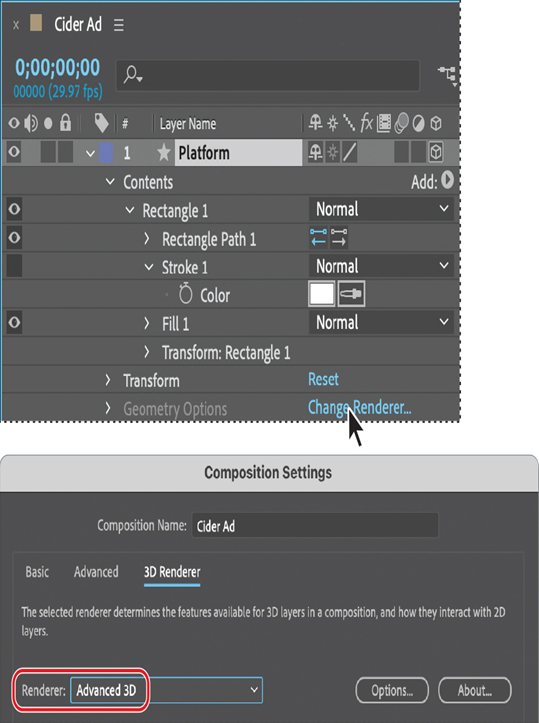
The Advanced 3D renderer won’t be available if your system doesn’t have enough dedicated video memory (VRAM). You can use the Cinema 4D renderer to extrude text and shapes, but won’t be able to import 3D models.
- In the Timeline panel, click Change Renderer next to Geometry Options.
- In the Composition Settings dialog box, choose Advanced 3D from the Renderer menu, and click OK.
Geometry Options settings become available in the Timeline panel.
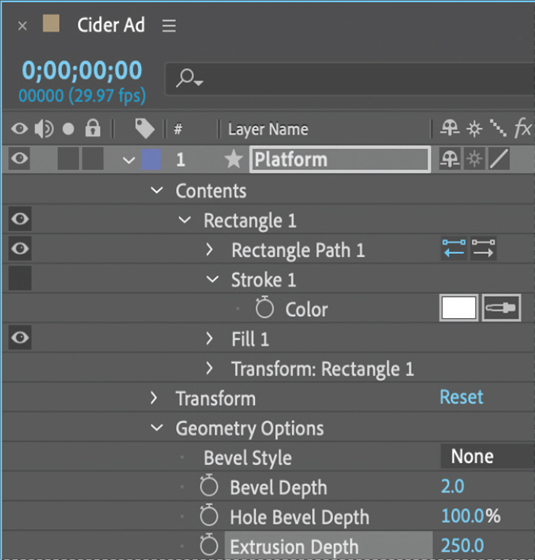
- Expand Geometry Options, and then change the Extrusion Depth to 250.
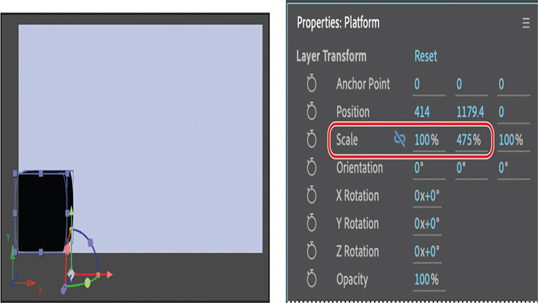
The platform is extruded, though only some of the extrusion is visible from this angle. The platform isn’t tall enough. You’ll scale it. - In the Layer Transform section of the Properties panel, click the link icon for the Scale property to unlink the values. Then type 475% for the Y Scale value.
- Select the Selection tool ( ), and then drag the platform to the lower left corner. Your Position values will differ from ours, depending on where you drew the original rectangle.
12.Hide the properties for all layers in the Timeline panel, and save your work so far.