Lesson overview
In this lesson, you’ll learn how to do the following:
- Create a 3D environment in After Effects.
- Import 3D objects.
- Rotate and position layers along x, y, and z axes.
- Use the 3D Transform Gizmo.
- Look at a 3D scene from multiple views.
- View a 3D ground plane.
- Animate a camera layer.
- Add lights to create shadows and depth.
- Extrude 3D text and shapes in After Effects.
- Use Cinema 4D with After Effects.
This lesson will take about an hour to complete. If you haven’t already done so, download the project files for this lesson from peachpit.com/AfterEffectsCIB2024, following the instructions in the Getting Started section under “Accessing the lesson files and Web Edition.”
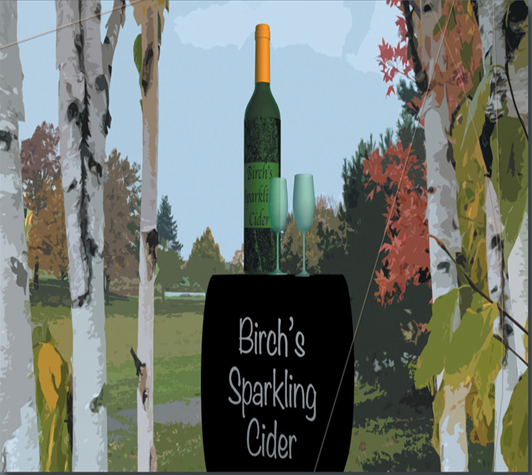
PROJECT: AD FOR A FICTITIOUS BEVERAGE COMPANY
By clicking a single switch in the Timeline panel in After Effects, you can turn a 2D layer into a 3D layer, opening up a whole new world of creative possibilities. Maxon Cinema 4D Lite, included with After Effects, gives you even greater flexibility.
Getting started
Adobe After Effects can work with layers in two dimensions (x, y) or in three dimensions (x, y, z). So far in this book, you’ve worked primarily in two dimensions. When you specify a layer as three-dimensional (3D), After Effects adds the z axis, which lets you move the object forward and backward in space. By combining this depth with a variety of lights and camera angles, you can create animated 3D projects that take advantage of the full range of natural motion, lighting and shadows, perspective, and focusing effects. In this lesson, you’ll explore how to import, create, and animate 3D layers as you create a simple ad for a fictional beverage company.
First, you’ll preview the final movie and set up the project.
- Make sure the following files are in the Lessons/Lesson12 folder on your hard disk, or download them from peachpit.com now:
• In the Assets folder: Bottle.glb, Trees.jpg, and Wineglass.glb
• In the Sample_Movie folder: Lesson12.mp4 - Open and play the Lesson12.mp4 sample movie in Windows Movies & TV or QuickTime Player to see what you will create in this lesson. When you’re done, close Windows Movies & TV or QuickTime Player. You may delete the sample movie from your hard disk if you have limited storage space.
When you begin this lesson, restore the default application settings for After Effects. See “Restoring default preferences” on page 3.
- Start After Effects, and then immediately hold down Ctrl+Alt+Shift (Windows) or Command+Option+Shift (macOS). In the Startup Repair Options dialog box, click Reset Preferences. Click New Project in the Home window.
- Choose File > Save As > Save As.
- In the Save Project As dialog box, navigate to the Lessons/Lesson12/Finished_Project folder. Name the project Lesson12_Finished.aep, and click Save.
- Click New Composition in the Composition panel.
- In the Composition Settings dialog box, do the following and then click OK:
• Name the composition Cider Ad.
• Choose HD 1920×1080 29.97fps from the Preset menu.
• Type 5:00 for the Duration.
• Select a pale blue color (we used R=194, G=200, B=236).
